Welcome Spring season 🌻and all the freshness and beauty it brings!! Me and LO spotted two Robins🐦 through the window, hopping around looking for food. LO wanted to feed the Robins, but we couldn't make it, as the climate was very cold and humid☁. And immediately a thought flashed in me. I had a used milk carton, and its time to recycle it!! And yeah we set out to work, LO helped me in gluing, coloring and doing the setup! :)
Friday, March 30, 2018
Thursday, March 22, 2018
Tuesday, March 20, 2018
Alphabet Parking lot : Match uppercase with lowercase Alphas
Cars are boys' favorite toy to play with 🚗🚘🚕🚙🚔🚓and LO is fond of alphabets too. So I decided to harness his love for cars and alphas into a fun activity. A great way to play and learn simultaneously, and also do some matching game with the upper case and lower case alphas.
Here's what I used :
- Toy cars
- White Tape
- Alphabet flash cards (lower case) - optional
- A clear plastic sheet - optional
You can also use :
A cardboard sheet/chart/poster board instead of flash cards. In that case you don't need a plastic sheet which I used. You can also check out this link https://www.kiwico.com/diy/Arts-and-Crafts-Ideas/1/project/Letter-Matching-Parking-Lot/1351 for a different version of the same activity.
First we gathered all the cars🚕🚗🚙. LO helped me in counting the cars and he arranged them in an order he wished. I wrote the upper case alphabets on a small piece of white tape and gave the choice to him to decide, on which car a specific alphabet should go.
He helped me in sticking the tapes onto the cars.
Since I had alphabet flash cards(lower case) I used it. You can also use a poster board or a chart to write the lowercase alphabets. The GOAL is to use the lowercase flash cards/poster board/chart as a parking lot and park (match) the corresponding uppercase cars!!
We used a plastic sheet which we had, to hold the flash cards in place. LO inserted the cards underneath the sheet. The setup is over and the real fun begins!😁To make the activity more interesting we used a Hot wheels race case Track set.
The fun continued about an hour!!!😁😁
To me, this an all-in-one activity with lots of hope to play, have fun and learn.🚗
Happy Parenting!😊
Friday, March 16, 2018
Mess free Sensory Bag Alphabet Play
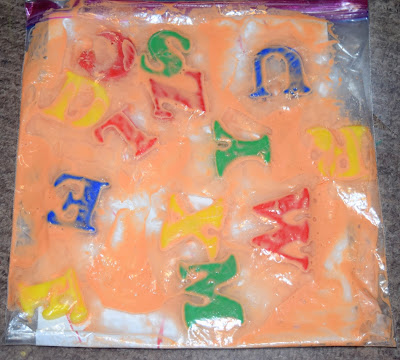
This is an easy to setup Alphabet Play and I'm sure this would be a hit with your toddler. I would say this needs lot more work from the little fingers, when moving the alphabets and hence kinda encouraging the fine motor skill. You can spice up this activity with your own thoughts or come up entirely with new stuffs to fill the sensory bag instead of the alphabets.
To people from Tamilnadu the sensory bag fill would look more like a "bajji maavu" because of the color!😜 I just used
- All purpose flour
- Food color
- Magnetic Alphabets (preferably)
- Zip-loc bags - 2
- A white paper
Write few alphabets on the sheet here and there and place it inside a zip-loc bag. Put this zip-loc inside another zip-loc. Then we need to process the flour. LO helped me in doing it. Mix the food color and water to the dough and make a running flour. Then fill this flour inside the outer zip-loc. We do this to minimize the mess. Then put the corresponding alphabets into the bag along with the flour. And now the fun begins!😊
The task is to move the alphabets and match it over the alphabets on the white sheet!! This wasn't easy as I thought to be! 😲The pasty flour didn't allow the alphabets to move with ease inside the bag!
Hope you love this idea!
Happy Parenting😊
Tuesday, March 13, 2018
Coloring with Crayons 3
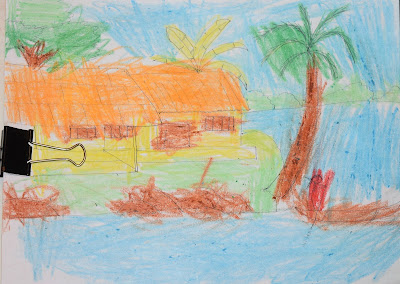
This coloring we did on an evening when I was cooking idly and chutney for supper. It seemed LO had done with the play for that day, and he got super cranky, that made me not to concentrate on my chutney recipe!! 😝So took a paper and drew the below which I copied from google! Gave him the mobile as reference for colors and I escaped to kitchen!😛
Gave me solid half an hour to cook supper! Happy LO and Happy Me!!!!😁
Happy Parenting 😊
Wednesday, March 7, 2018
Tuesday, March 6, 2018
Saturday, March 3, 2018
Paper resist painting
Yippee... !!:) This is my 75th post at Sindhu's Cocoon🎈🎉😊😊 So I thought to make it more colorful and also add a surprise element for LO!! This Paper resist painting is so easy to setup and kids will enjoy doing it!
All done!! :)
Using contact paper is the best way to do this art. Since I didn't have contact paper, we just used normal paper and glue stick to hold the shapes in place.
Materials:
- Paint
- Paint Brush
- Canvas or chart or white paper
- Glue Stick
- Contact Paper (Optional)
I decided to have Butterfly and Heart shapes this time💗. So made different sizes in each with the white paper(Used symmetry property to cut the shapes easily). Glue these pieces on to the big white paper. If you are using contact paper just cut out the shapes and stick them on to the white paper. You can get your kids help in sticking these. Rest is fun! Paint the entire paper with your favorite colors.
Once done, remove the glued pieces...TADA!!! 😀😀😀An amazing paper resist painting all complete!!😊
From my experience I would suggest you to remove the glued pieces when the paper is still wet. Since the glued pieces are easy to remove when wet. If you are using contact paper then it shouldn't be a problem.
Since this is our 75th post I added some extra fittings!! 😉LO helped me in completing the writing work. I wrote using pencil and he traced over it with a marker! 😊
Happy Parenting :)
Subscribe to:
Posts (Atom)


